10 Best Spacers for Outdoor Tiles
The smell of damp earth and the iron scent of wet stone signal the start of a hardscaping project. When the turgor pressure in surrounding vegetation is high, the soil is stable enough to support the weight of heavy porcelain or natural stone. Achieving a professional finish requires more than just a steady hand; it requires the best spacers for outdoor tiles to ensure structural integrity and proper drainage. Without precise spacing, the natural expansion and contraction of materials will lead to edge spalling or structural failure. In high-traffic outdoor environments, the gap between tiles serves as a critical expansion joint. This space allows for the application of polymeric sand or specialized grout that prevents weed ingress and manages moisture runoff. A master horticulturist understands that the hardscape is the skeleton of the garden. It must be built with the same precision as a planting plan, accounting for thermal movement and the hydraulic conductivity of the substrate. Proper spacing ensures that the rhizosphere of adjacent plantings remains undisturbed by shifting stone or pooling water.
Materials:
![]()
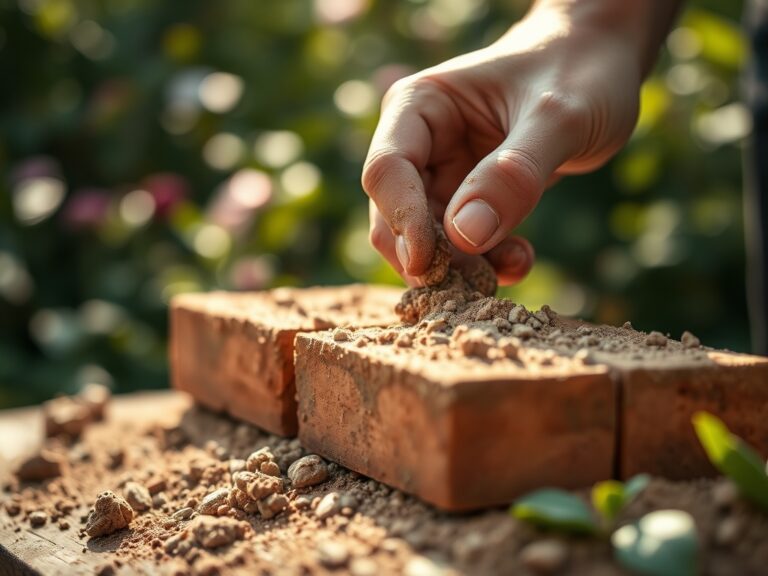
The foundation of any tile installation is the substrate. For outdoor applications, a **friable loam** or a well-graded crushed stone base is essential. The soil pH should be maintained between **6.0 and 7.0** to prevent acidic runoff from degrading concrete-based adhesives. When working near garden beds, ensure the soil has a high **Cation Exchange Capacity (CEC)**, typically between **15 and 25 meq/100g**, to buffer against mineral leaching from the installation materials. Use a **10-10-10 NPK ratio** fertilizer in surrounding soil to support root recovery after the compaction required for the sub-base. The spacers themselves must be made of high-density polyethylene or similar non-reactive polymers. These materials resist UV degradation and chemical interactions with alkaline mortar. For large-format outdoor tiles, a **3/16 inch (4.8mm)** or **1/4 inch (6.4mm)** spacer is the industry standard. This width accommodates the thermal expansion coefficient of most natural stones and porcelains.
Timing:
Installation must align with specific environmental windows to ensure the curing process is not disrupted. In Hardiness Zones 5 through 7, the ideal window is between the last spring frost and the first autumn freeze. Ground temperatures must remain above 50 degrees Fahrenheit (10 degrees Celsius) for at least 48 hours to allow thin-set and grout to reach their peak compressive strength. The biological clock of the surrounding landscape also dictates timing. Avoid heavy construction during the transition from the vegetative stage to the reproductive stage of nearby perennials. This period, often triggered by a photoperiod change, is when plants are most sensitive to root zone disturbance. Aim for a period of low humidity, ideally below 65 percent, to prevent the premature evaporation of moisture from the setting bed, which can lead to "soft" joints and eventual cracking.
Phases:
![]()
Sowing the Foundation
The "sowing" phase involves preparing the sub-base with a 95 percent Proctor density compaction. Lay a geotextile fabric to separate the sub-grade from the aggregate. This prevents the migration of fine soil particles into the drainage layer, which would otherwise reduce the hydraulic conductivity of the site.
Pro-Tip: Maintaining a stable sub-base prevents differential settling. This is the geological equivalent of auxin suppression in plants; by controlling the base, you dictate the growth and stability of the entire structure above it.
Transplanting the Tiles
When placing the tiles, utilize a "back-buttering" technique to ensure 100 percent mortar coverage. Insert the best spacers for outdoor tiles at every corner intersection. For large slabs, use a secondary spacer at the midpoint of each edge to prevent bowing. Use a rubber mallet to seat the tile, checking for level across a 10-foot span.
Pro-Tip: Spacers act as a mechanical buffer against thermal stress. Just as mycorrhizal symbiosis allows roots to expand their reach through a network, spacers create a network of joints that distribute weight and movement across the entire patio surface.
Establishing the Joints
Once the adhesive has cured for 24 to 48 hours, remove the spacers. Fill the voids with a high-performance polymeric sand or an epoxy-based grout. This material must be compacted into the full depth of the joint to prevent the accumulation of organic matter that could host opportunistic fungal pathogens.
Pro-Tip: A solid joint prevents phototropism in weeds. By blocking light from reaching the substrate, you suppress the germination of unwanted seeds that could compromise the structural integrity of the tile edges.
The Clinic:
Monitoring the health of both the hardscape and the adjacent softscape is a continuous process. Use this diagnostic guide to identify and rectify issues.
Symptom: White, powdery substance on tile surfaces (Efflorescence).
Solution: This is caused by mineral salts migrating through the porous stone. Scrub with a dilute citric acid solution and improve sub-surface drainage to reduce moisture wicking.
Symptom: Yellowing leaves on plants adjacent to the patio (Nitrogen chlorosis).
Solution: Construction runoff can spike soil pH, locking out nitrogen. Apply a chelated iron supplement and a high-nitrogen liquid fertilizer to restore the chlorophyll synthesis process.
Symptom: Tiles "tenting" or lifting at the center.
Solution: This indicates a lack of expansion joints. Remove the affected tiles and reinstall using wider 1/4 inch spacers to allow for thermal movement.
Fix-It Section: For general nutrient deficiencies caused by soil compaction, use a core aerator around the perimeter of the patio. This increases oxygen availability in the rhizosphere, promoting the aerobic respiration necessary for root recovery.
Maintenance:
A professional-grade outdoor space requires precise upkeep. Use a soil moisture meter to monitor the transition zone between the tile and the turf. Plants at this edge often suffer from "heat island" effects. Provide 1.5 inches of water per week at the drip line using a soaker hose to prevent desiccation. Use a hori-hori knife to remove any stray weeds that find purchase in the grout lines. For woody ornamentals nearby, use bypass pruners to maintain a 12-inch clearance between foliage and the tile surface. This promotes airflow and reduces the risk of senescence caused by trapped heat. Every three years, inspect the joints and replenish polymeric sand as needed to maintain the structural seal.
The Yield:
While a patio does not produce a caloric yield, its success is measured by its longevity and the health of the surrounding ecosystem. A correctly spaced patio allows for "day-one" freshness in the garden's appearance for decades. By managing the interface between stone and soil, you create a stable microclimate. The stone acts as a thermal mass, extending the growing season for nearby plants by several weeks in the autumn. This heat retention can be leveraged to grow marginal species that would otherwise succumb to early frosts in Zone 6 or lower.
FAQ:
What is the best width for outdoor tile spacers?
For most outdoor applications, a 3/16 inch or 1/4 inch spacer is ideal. This width accommodates the natural expansion and contraction of materials due to temperature fluctuations and ensures the grout joints are deep enough for structural stability.
Can I leave spacers in the grout?
No. Spacers must be removed before grouting. Leaving them in place creates "soft spots" in the joint where the grout is too thin. This leads to cracking and allows water to penetrate the substrate, causing potential freeze-thaw damage.
Why are T-shaped spacers better for some patterns?
T-shaped spacers are designed for offset or "running bond" patterns. They provide consistent spacing at the junction where one tile end meets the midpoint of another, ensuring the linear integrity of the installation across large surface areas.
How do spacers help with drainage?
While spacers do not drain water themselves, they ensure uniform joint widths. Consistent joints allow for the even application of permeable materials like polymeric sand, which facilitates controlled water runoff and prevents localized pooling on the tile surface.