9 Technical Steps to Shingle a Gazebo Roof
The scent of damp cedar resin and the cool humidity of a low-pressure system signal the ideal window for structural maintenance. When the turgor pressure in surrounding woody perennials is high and the soil is firm enough to support a ladder without compacting the rhizosphere, you are ready to begin. Learning the steps to shingle a gazebo roof requires the same precision as grafting a scion. A single misaligned course of asphalt allows moisture to penetrate the decking; this leads to fungal decay and structural senescence that can collapse a garden focal point within five seasons. Proper installation ensures the structure remains a dry sanctuary for decades.
Materials:

Before climbing the ladder, ensure your workspace is prepared with the same care as a seedbed. The substrate beneath the gazebo should be a **friable loam** with a **pH between 6.0 and 7.0** to support high Cation Exchange Capacity (CEC) if you plan to landscape the perimeter. Avoid working over saturated clay; high foot traffic during construction will collapse the macropores and suffocate local root systems.
Required inputs for the roof include:
- Architectural shingles: Rated for wind speeds up to 110 mph.
- Drip edge: Aluminum or galvanized steel to prevent capillary action.
- Underlayment: Synthetic felt or 15-pound tar paper.
- Fasteners: 1.25-inch galvanized roofing nails.
- Starter strips: Pre-cut or modified shingles to initiate the first course.
- Hip and ridge caps: Specifically tapered for the geometric convergence of a gazebo.
Timing:
Schedule this project during Hardiness Zones 4 through 8 shoulder seasons. The optimal temperature window is between 50 and 80 degrees Fahrenheit. If the ambient temperature drops below 40 degrees, asphalt shingles become brittle and prone to thermal fracturing during nailing. Conversely, temperatures exceeding 90 degrees soften the bitumen; this leads to scuffing and compromised granule adhesion. Align your work with the "Biological Clock" of your garden. Perform roofing after the spring flush of vegetative growth but before the reproductive stage of local pollinators to minimize disturbance to the ecosystem.
Phases:

Sowing the Foundation
The first of the steps to shingle a gazebo roof is the installation of the drip edge and underlayment. Install the drip edge along the eaves first; then roll out the underlayment starting from the bottom. Overlap each layer by at least 4 inches to ensure a water-shedding transition. Secure the underlayment with plastic cap nails spaced every 12 inches.
Pro-Tip: Ensure the underlayment is taut. Just as auxin suppression in plants prevents lateral branching to focus energy on vertical growth; a smooth underlayment prevents "telegraphing" bumps through the shingles, which can create micro-pockets where ice dams form.
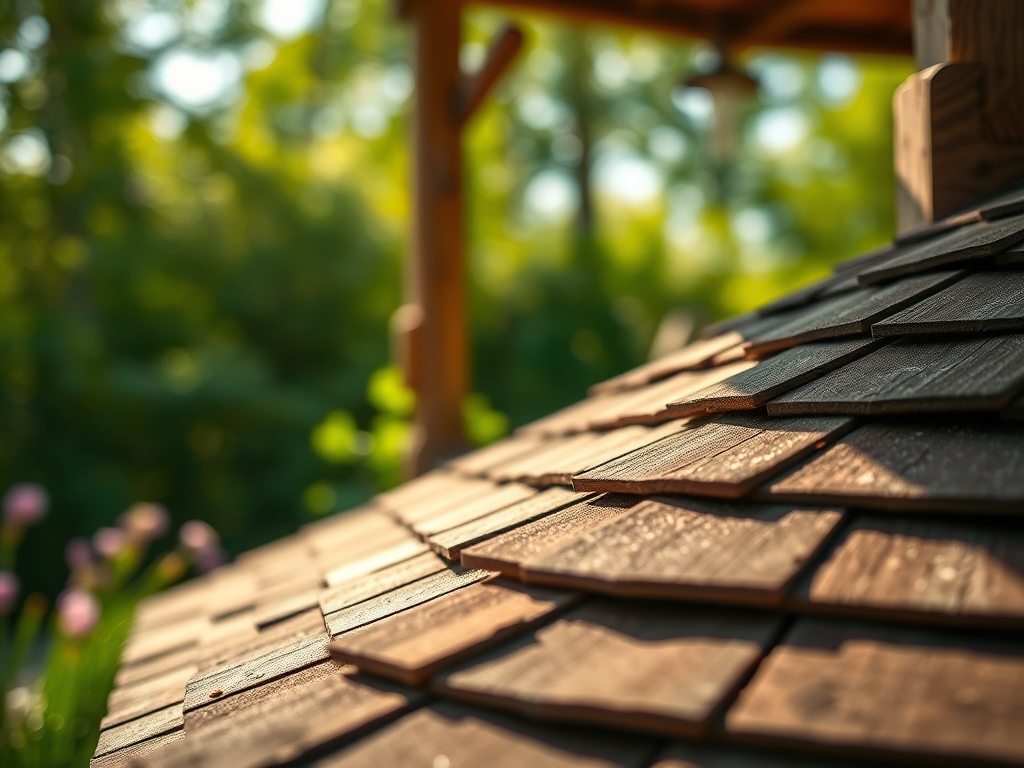
Transplanting the Shingles
Start at the lowest point of one triangular roof section. Install the starter strip so it overhangs the drip edge by 0.5 inches. This overhang breaks the surface tension of rainwater; it directs the flow away from the wooden fascia. Lay the first course of shingles directly over the starter strip. Stagger the joints of the second course by 6 inches to ensure no vertical seams align.
Pro-Tip: Use a chalk line to snap horizontal guides every 5 inches. This maintains geometric symmetry. In botany, phototropism guides a plant toward the light; in roofing, these lines guide your progress to prevent "shingle creep" on the steep facets of a gazebo.
Establishing the Peak
Gazebos typically feature a hexagonal or octagonal pitch where multiple planes meet at a hip. Cut individual shingles into tapered pieces to cover these hips. Start from the bottom of the hip and work toward the center peak. Each hip cap must overlap the one below it by 5 inches. Finish the peak with a specialized hub or a final circular cap piece.
Pro-Tip: Apply a bead of polyurethane sealant under the final cap. This mimics mycorrhizal symbiosis by creating a tight, protective bond between two different materials; it prevents wind-driven rain from infiltrating the most vulnerable point of the structure.
The Clinic:
Structural "disorders" often mirror botanical deficiencies. Monitor your roof for these physiological symptoms:
- Symptom: Granule Loss. Solution: This is the "senescence" of the shingle. If more than 20 percent of the granules are in the gutter, the bitumen is exposed to UV degradation. Replace the affected plane.
- Symptom: Curling Edges. Solution: Often caused by poor ventilation. Ensure the gazebo ceiling allows for air exchange to prevent heat trap.
- Symptom: Moss or Lichen Growth. Solution: This indicates a high-moisture microclimate. Increase light penetration by pruning overhanging branches with bypass pruners.
Fix-It for Nutrient Deficiencies: If the surrounding foliage shows Nitrogen chlorosis (yellowing leaves with green veins), the runoff from your new roof may be altering soil chemistry. Apply a balanced 10-10-10 NPK fertilizer to the drip line to stabilize the rhizosphere during the construction recovery period.
Maintenance:
A gazebo roof requires the same vigilance as a high-value specimen tree. Use a soil moisture meter to ensure the runoff from the new roof isn't drowning the foundation plantings. Most shrubs require 1.5 inches of water per week at the drip line.
Every autumn, use a hori-hori knife to scrape away any debris or organic matter trapped in the roof valleys. Debris holds moisture; it creates a substrate for fungal spores to germinate. Inspect the flashing around the center cupola twice a year. If you find loose fasteners, reseat them immediately to maintain the structural integrity of the wood.
The Yield:
The "yield" of a properly shingled gazebo is measured in longevity and the protection of the interior space. A successful installation provides a dry environment for curing harvested herbs or drying flower heads. When harvesting lavender or yarrow, cut the stems in the early morning when turgor pressure is at its peak. Hang them from the interior rafters of your newly shingled gazebo. The shade and airflow will preserve the essential oils; this ensures "day-one" freshness for your botanical preserves.
FAQ:
How many shingles do I need for a standard gazebo?
Calculate the total square footage of the roof facets and add 15 percent for waste and hip cuts. Most 10-foot octagonal gazebos require approximately 4 to 5 bundles of architectural shingles.
Can I install shingles over an old layer?
No. Adding a second layer increases the dead load on the rafters. It also traps heat; this accelerates the thermal degradation of the shingles and can lead to premature structural failure of the roof decking.
What is the best nail length for gazebo roofing?
Use 1.25-inch galvanized roofing nails. This length ensures the fastener penetrates the shingle and the 0.5-inch plywood decking without protruding excessively through the underside of the ceiling where it would be visible.
Do I need a ridge vent on a gazebo?
Most gazebos are open-air structures and do not require functional ridge venting. However, a cupola can be installed at the peak to provide a decorative finish and allow rising heat to escape the interior canopy.